Showing posts with label machine quilting. Show all posts

Friday, October 2, 2015

Circa 1930 Quilt

Giving new life to an orphan -

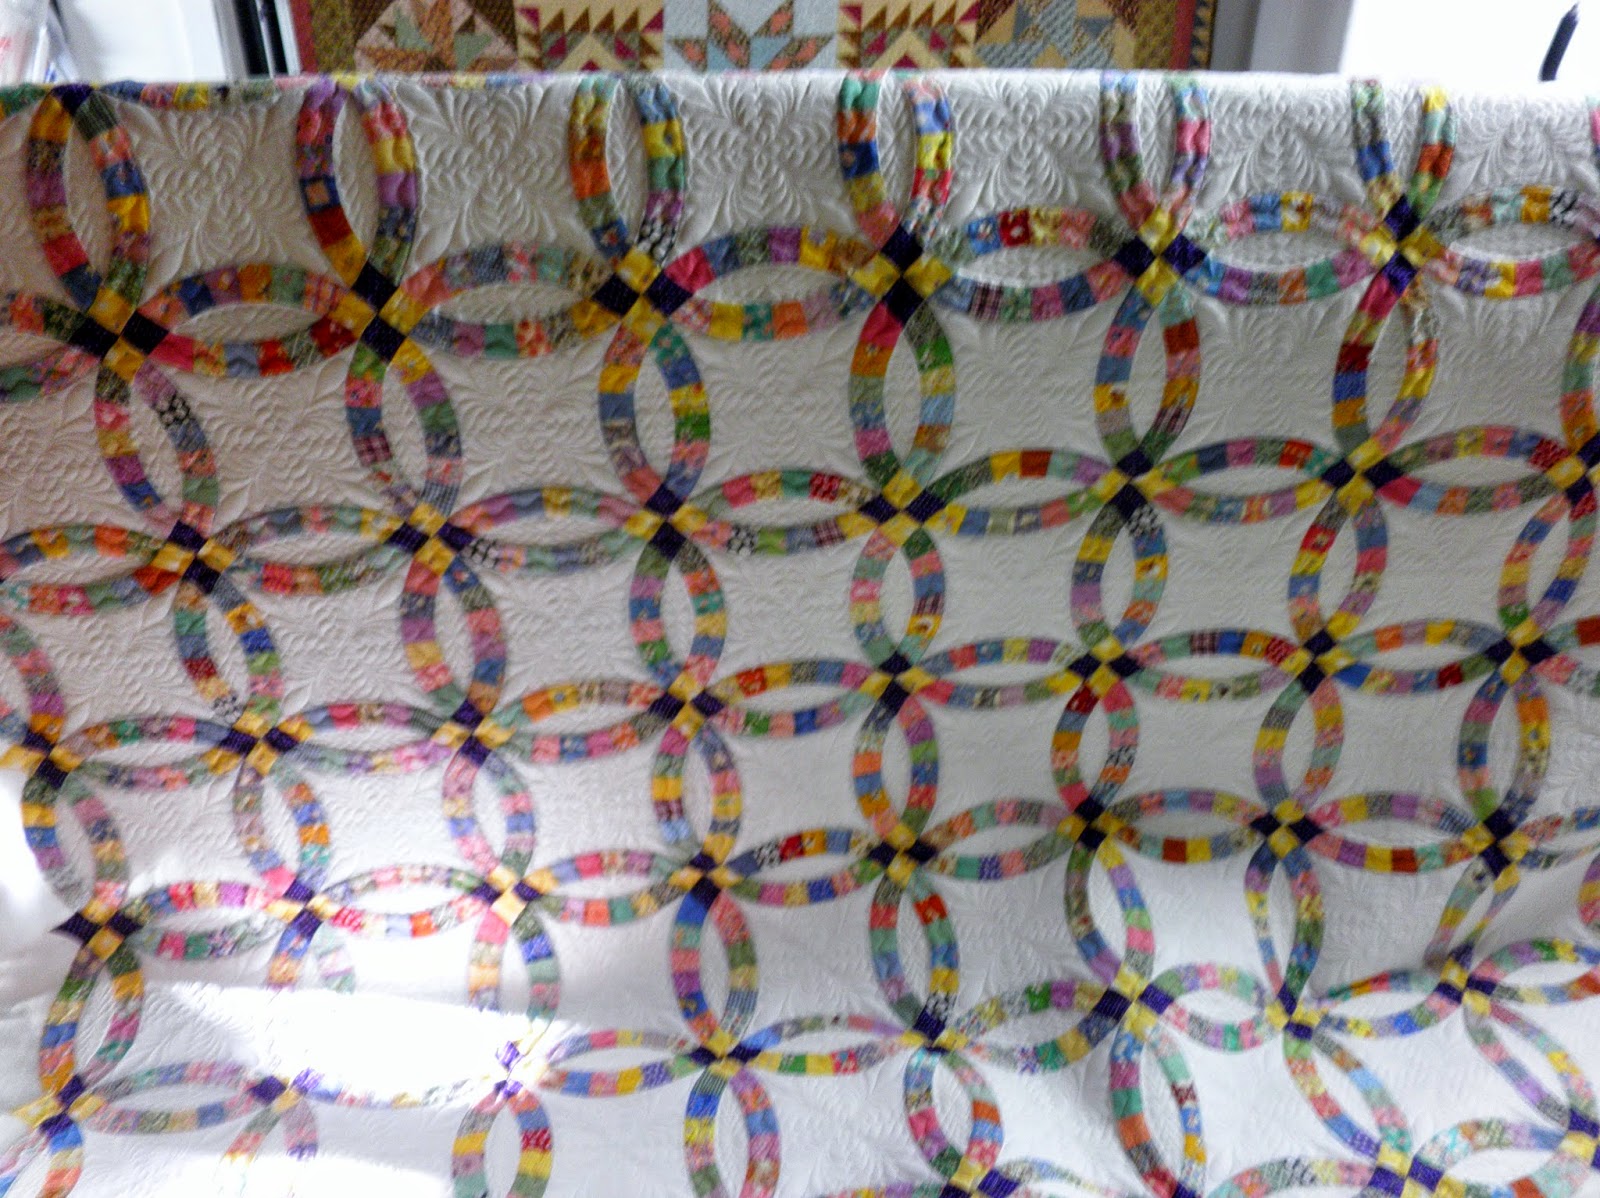
Quilt as it is unloaded from the longarm.
At least that's what Linda Taylor says to think about when you machine quilt a "found" orphan quilt top. I always cringe when someone tells me they bought a quilt for $5 at a garage sale - the family selling it not understanding the amount of  hard earned money the material cost, or how many untold hours it took to complete. For this one, I picture the family watching the quilt being made - the painstaking hours of cutting out small remnants of fabric and then the piecing it together, bit by bit, with the hope that one of them would someday have the pleasure of warming themselves with it during cold nights. But then a tragedy occurs and the quilter is no longer with them. They have no idea how to finish the quilt, but they hang on to it, remembering their loved one in the process. Then, many years later, it is found in an old trunk, and the finder doesn't even know who did the work. The original family is long gone, and no one seems to know anything about it, so gives it to goodwill, where someone picked it up one day and said wow - what a find!!

Back of the quilt.
 This one was purchased at the Houston Quilt Market a few years ago. Now, previous to Linda making her statement at a workshop I thoroughly enjoyed, I would have been shaking in my shoes to take a machine to a hand pieced quilt that was this old, but I considered what she said, and tried to give honor to that loved person who took such time to hand cut and piece this intricate design. I cannot imagine how many hours it took - there are so many small triangles!!! The quilter must have also run out of the original green, since the border areas have a darker green hexagon than the body, and had to make due. That's what makes our quilts special - each one has its own unique characteristics.


A Closer look.
With all this in mind, most of the work I put into this quilt cannot be seen. I felt the original quilter would have most likely hand quilted a crosshatch pattern through all those triangles, so a stitch in the ditch was used in those areas. The result was a diamond pattern that is best seen on the back of the quilt.


For the center green hexagons, I wanted to give the quilt a little more character, but still keep it simple, so a very plain flower was placed in these areas.

My hope is the original quilter is looking down from heaven and smiling, pleased that her hard work has been given a good home and is at last completed.
Chain of Fools

I have also finally finished my "Chain of Fools" quilt, so here it is. It's always good to complete a project!!

That's it for now. Until next time, happy quilting!
Cathy

Verse for the day: "The heart is more deceitful than anything else and is desperately sick; who  can understand it? I, the LORD, search the heart, I test the mind, even to give to each man according to his ways, according to the results of his deeds." (Jer. 17:9-10)


Monday, September 7, 2015

Marsha's Smokey River Quilt

Sometimes simple is best.


overall quilt
When Marsha brought me this quilt, her request was to keep the quilting simple, (She knows I can sometimes get carried away!) so that's what I did. The large blocks of strip piecing in the quilt are actually what I puzzled over the most! So while I was thinking about these, I started filling in the other areas, since many times this helps to determine what will be done with those "wonder what I will do with these".


border area
I usually do the border first, just to keep the quilt contained, and as I loaded the quilt, it was obvious that the border was a bit wonky, so the pattern chosen here was a curvy swirl pattern that would take up the excess in that border fabric. The 9 patch areas are a simple basic curve pattern to compliment the border, and the black border has a simple diamond pattern. Since straight lines were used in this part of the border, a triangular Greek key pattern was used for the light blue triangles between the 9 patches.


Main block areas
Moving on to the larger blocks, to keep the star areas simple, basic continuous curve and swirl patterns were used, with the same pattern in 9 patch and chain areas that was used in the border. Okay - so now what's left are those large strip pieced areas. Since line patterns were used in the border, the same concept was brought into these areas to compliment, this time as an "X" pattern running through the 3 colored strips. The result is a combination of curves and straight lines throughout the quilt, and does finish with a simple look. (Marsha was pleased.)

So I hope you are all getting back on to some sort of a normal schedule, now that school in back underway. Hopefully that means you have time to quilt again!


Until next time, happy quilting!
Cathy


A closer view
Verse for the day: " Remember the former things long past, for I am God, and there is no other; I am God and there is no one like Me, declaring the end from the beginning and from ancient times things which have not been done, saying 'My purpose will be established, and I will accomplish all My good pleasure.'"
(Isaiah 46:9-10)
Strip pieced areas

Thursday, June 25, 2015

Carol's Stars


Before quilting
When this blue and yellow quilt was brought to me, Carol told me the pattern was supposed to form circles, but neither of us could see them. The top of the quilt is shown at right as it was draped over my machine (with a few sticky notes attached to remind me of what I planned once the quilt is loaded.) The pink contrasting stars are a "cancer awareness" reminder.


colored pencil sketch to help me think

Often,  I draw the quilts out on graph paper so that I can play a bit and get my creative juices going. When I drew this one out, the circles really popped out at me, so I sketched them in and started playing with some possible patterns.


This really looked like a wedding ring quilt in my drawing, and I had to stare at the actual quilt for a while to allow the pattern to set into my mind.


finished quilt
Once I had the pattern fixed in my head with a few ideas going, I loaded the quilt and got to work. I did the circles first, since the remainder of the patterns would depend on them. These were very large circles - I think 26" - so I had to do them as 1/2 circles to fit into my throat space.


When all the large circles were complete, patterns were placed into the shapes formed by the overlapping circles.


circular pattern detail

My quilts usually evolve as I work, since they seldom end up like I thought they would when I began. Line patterns were designed to fit into the outlined areas, and, in this case, I felt some background fill was needed around the star areas, so I used a pebble pattern.


"Pillow" area


star detail


back of quilt


"Chain of Fools" on my design wall
This quilt took me a while to complete, but I really like the finished look, and I hope you do too.


On another note, my "Chain of Fools" quilt is coming along. I cannot even begin to count the number of times I have had to take things apart because I got the triangles turned the wrong direction, but I think I am about two thirds of the way done!


That's it for now. Until next time, happy quilting!!!

Cathy

Verse for the day: "Be not forgetful to entertain strangers, for thereby some have entertained angels unaware." (Heb 13:2)

Saturday, May 16, 2015

A Cowboy Quilt

Howdy!

This one was really a fun quilt to work on. I definitely had to doodle a bit to figure out what to do for these hats and boots, but it finally clicked for me.

One note I would like to make on this one is that the rope in the border was put on prior to quilting - this is NOT the way to do this. It was very difficult to work with, and also caused the quilt itself to be distorted, especially in the corners. Any embellishments should always be added AFTER quilting. (In case you are wondering, she made the "rope" by braiding two colored rick-racks together.)


The hats were actually a bigger challenge for me to do than the boots, and after looking at many pictures of cowboy hats, I opted to simply decorate the band a bit, and add in what I hoped looked like natural creases. Since the hats also had an additional white space below, a complimentary boot/hat border added a little extra charm here.


Some creases were also added to the boots, as well as continuous curve in the square blocks of the boot top, and they definitely needed some spurs!

Since the hats and boots did not have a lot of quilting actually in them, the background area around them was stippled for some extra texture.


The black border/sashing areas were stitched with loops and stars. To work with the "rope", a simple wavy pattern was used to compliment, and for the red corner blocks, a simple continuous curve.


Well quilting pardners, that's all for now. Until next time, happy quilting!
Cathy

Verse for the day: "Do you not know that friendship with the world is hostility toward God? Therefore, whoever wishes to be a friend of the world makes himself an enemy of God." (James 4:4)

Monday, April 27, 2015

Skyrocket

Colorful and Scrappy!

This quilt uses batik scraps to make the "Skyrocket" pattern. My husband thought it was a bit too colorful, but I think it's wonderful.
The bright colors just give it such a cheerful look.


The blocks were connected through the white space, so I created a line pattern to fit, and incorporated the same design used in the sashing.


Because the "Skyrocket" areas were so colorful, I thought simple would be best for these, so I incorporated straight lines and curves to fit the pattern.


The colorful border - picked to try to incorporated the many colors in the quilt - needed something to tone it down a bit, so  a detailed star pattern was used with a dark blue (toning down) thread.


The back of the quilt shows up all the designs quite nicely.


Until next time, Happy Quilting!
Cathy

Verse for the week: "For Ezra had set his heart to study the law of the LORD and to practice it, and to teach His statutes and ordinances in Israel." (Ezra 7:10)

Saturday, March 28, 2015

Some Recent Pantographs

A view of the whole quilt.
It seems I have been doing at lot of edge to edge quilting lately. I do enjoy them because they give me a break from the intensity of the work on custom quilts. Here are some of the most recent ones:

This first quilt has a pattern called windy day which seems to give movement to those pinwheels.

Close up of the pattern


back of quilt


The next quilt is the same quilt as the first, but with the colors in the negative space reversed. This edge to edge pattern is quite swirly!


A red, white, and blue quilt, with a block feather pattern quilted in.


This next quilt is a handkerchief quilt - I have not seen one of these before, and found it very unique. This one has an all over stipple pattern.


This Daisy Chain quilt also has an all over feather pattern.


And, last one for this blog, a charity quilt with a floral pattern quilted in.


I know it's been a while since I have updated my blog, but Dale's recovery from knee replacement surgery has been keeping me extra busy. I hope you are all doing well!

Until next time, happy quilting.
Cathy

Sunday, February 8, 2015

A Traditional Wedding Ring Quilt

Traditional Quilts are Still Beautiful!

Good morning, happy quilters! I meant to get this one posted long before now, but things have been a bit hectic lately. But - I am joyful today because my God is good and He has blessed me with a new day!


The quilt as I took it off of the machine.
This quilt is one of my favorite patterns, but one I have yet to try because I know it is so difficult to do. Thankfully, others are braver than I am and willing to try!. I just love the look of a wedding ring quilt and think it is one of the most beautiful patterns out there. After quilting this one, I have become challenged, and have ordered some templates and pattern so that some day, when I get brave enough, I can try my hand at this also.

Anyway, since this is a traditional quilt, I chose a traditional quilting patterns for it. I think it came out beautifully, and I hope you enjoy checking it out!.


Pattern detail


A closer look.
Dale is going in for knee replacement next week, so it will be a while before things get back to normal around here (as though things are ever normal!) But I will still be getting in some longarm quilting whenever I can - I love my job!
 Hope to be posting again soon, but in the meantime, happy quilting everyone!
Cathy

Verse for the day: "These things I have spoken unto you, that in me ye might have peace. In the world ye shall have tribulation: but be of good cheer; I have overcome the world." (John 16:33)


Wednesday, December 3, 2014

Red, White and Black Bandanna Quilt

Left This Out!

What can I say - I was in such a hurry with my last post that I left this out - now you know how feeble my mind is!

This one was quilted with a feather panto using red thread - sounds a bit bold, but the end look of it is fabulous. Sometimes dramatic is the way to go!

Until next time, Happy Quilting!
Cathy

Tuesday, December 2, 2014

Blackford's Beauty & a Red/ Black Bandana Quilt

Crunch Time!

With the Christmas holiday quickly approaching, I am becoming more and more aware of the many quilts there are still hanging in my closet awaiting their completion!

Some quilts just seem to take me a lot longer than I anticipate once I get going on them, and that certainly did apply to this quilt, called Blackford's Beauty in Plaids, but I love the way it came out.


This was one of those with a lot of white space, so I had to use the "divide and conquer" method, quilting a diamond pattern to separate different quilting spaces. Since feathers were used in the  border, the plaid stars, and the pinwheels, they were also put into the diamond area for continuity. A flame fill pattern was used in the center, and a more dense clam-shell fill used in the remainder of the space.


That's it for now - have to get back to quilting! Hope you all enjoyed a very blessed Thanksgiving - we have so much to be thankful for.

Until next time, Happy Quilting!
Cathy

Verse for the day: "Daniel said, "Let the Name of God be blessed forever and ever, for wisdom and power belong to h\Him." (Daniel 2:20)

Sunday, September 28, 2014

Woodland Christmas Applique

outer border
Fall Greetings!

It is hard to believe that summer is over and our busiest season about to approach, but yes, it is coming quickly! Already, my schedule is quickly filling with holiday requests, and I love seeing them - it sets my anticipation for all the season has to offer.


Regretfully, I somehow did not manage to take a picture of the whole quilt for you -  I am so sorry, for it really was a wonderful detailed applique and you will miss the full appreciation for the work that went into it. The woodland creatures included bears, foxes, raccoon, hedgehogs, bunnies, and birds among a mix of houses, trees, and stars, which allowed opportunity for a variety of fills and detail work. It has a winter-y looking swirled outer border, leafy corner blocks,  and a holly leaf  pattern for the inner.


One of the house blocks - hmm,
 bears protecting the town hall?


corner detail


Bunnies, fox, and bear admiring
the tree decorations.

All the woodland animals
pitching in to help.

Santa has a new helper!

Hedgehogs preparing for the celebration.


Somehow, these raccoons look
a bit mischievous.


And Merry Christmas to all!


As you can see, this is just a fun quilt and I really enjoyed working on it - thank you, Barb! If you were able to attend Quilt-a-Fair in Longmont, you may have seen it hanging at the Laughing Ladies booth. We have been in New Mexico, so were unable to attend, but hope you were able to enjoy all the variety offered there!

Until next time, happy quilting!
Cathy
Verse for the day: "Sing unto the Lord, O ye saints of His, and give thanks at the remembrance of His holiness." (Psalm 30:4)